Do you know the following situation?
You’ve managed to organize a few free hours at short notice and set off on a spontaneous photo excursion. So far, everything is going well and you’re looking forward to the free time to take photos in nature, when you suddenly realize that you’ve forgotten something important.
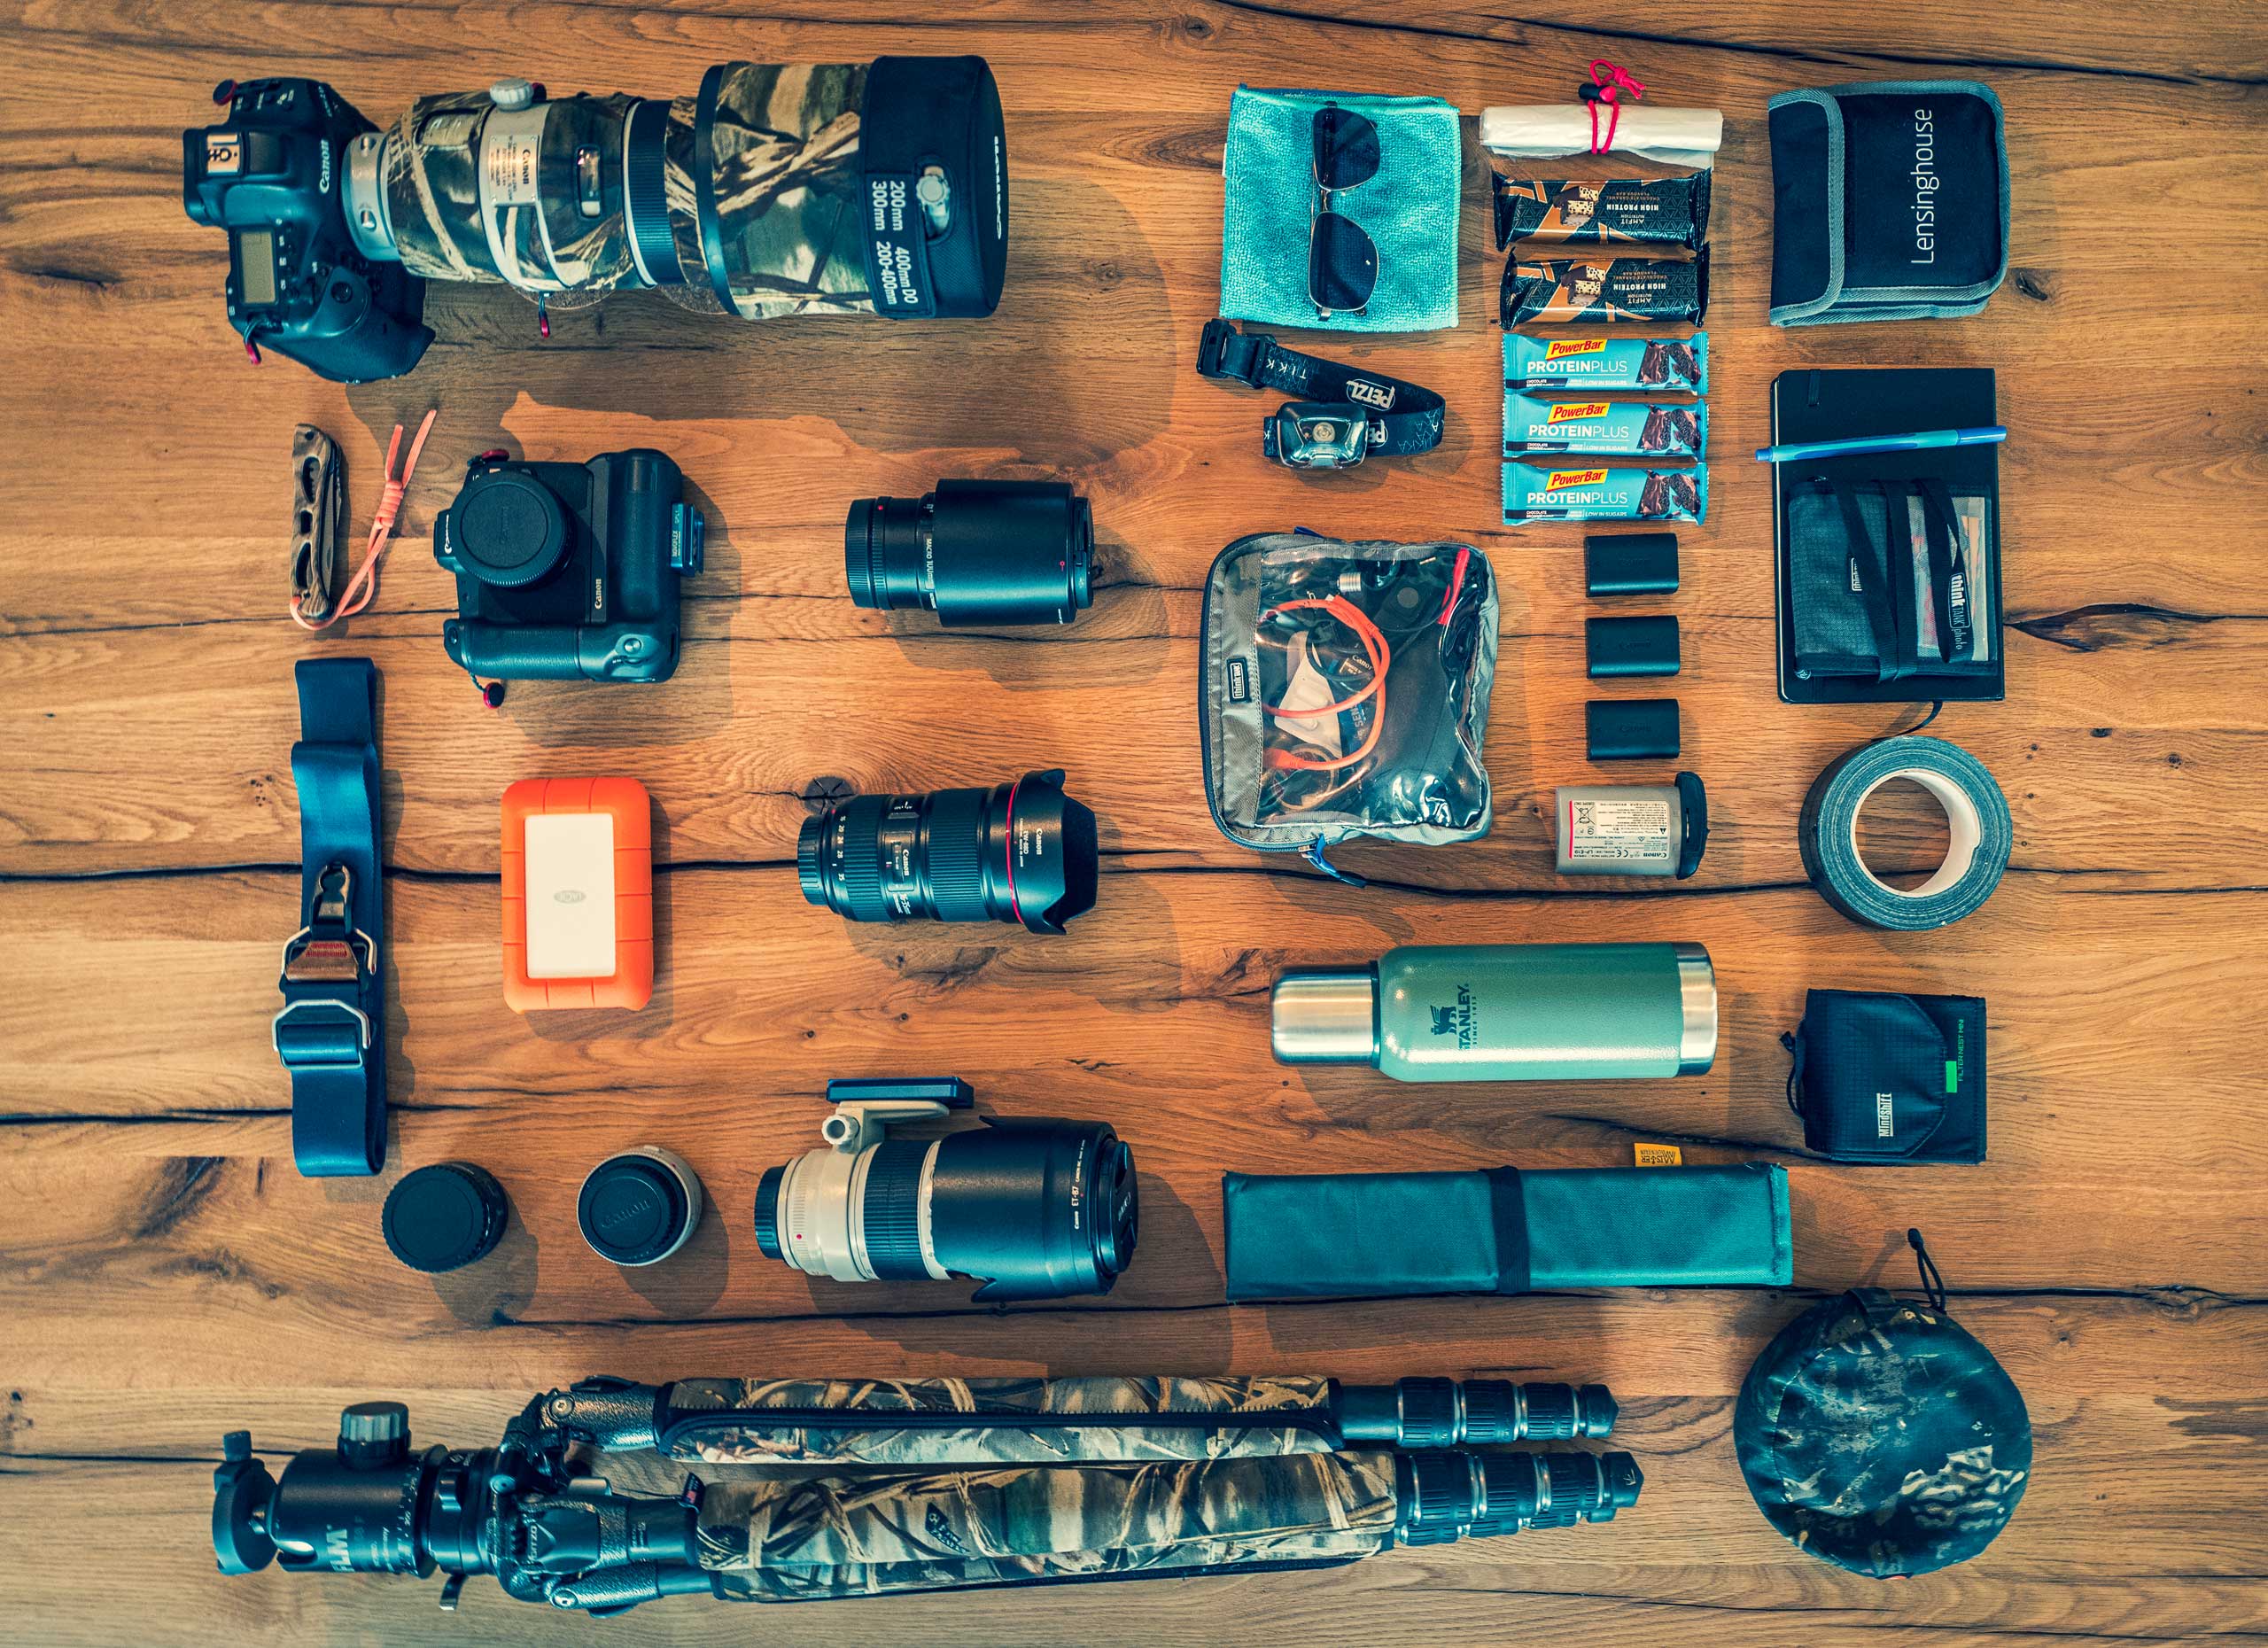
For example, the headlamp for the way back through the dark, the power bar for when you get hungry in between, or you think to yourself “…shouldn’t I have packed the macro lens after all?”.
Or maybe you know the opposite situation?
You ask yourself during or after the photo tour why you only used half of the items in your heavy photo backpack?
“Couldn’t I have thought about this better beforehand?” is a question I have sometimes asked myself in the past, as I tend to pack too much, which then means that it restricts my “mobility” outside.
However, I also know photographers who never ask themselves this question, as they have opted for the “always have everything with you solution”, if 15-20 kg of photo luggage doesn’t bother you, a valid solution.
So how do I prepare myself quickly and optimally (having the “right” things with me) for my upcoming photo tour?
1) I ask myself in advance, what are my photographic goals today? What can I expect on location? Do I have to walk longer or will I reach my destination very quickly and can therefore pack a bit more? Which equipment, in particular which lens, is best suited to the desired shooting situation? What other photographic situations could arise? What is the weather forecast for this time?
2) I use my “photo equipment packing list”. My packing list is a list created in the “Microsoft To Do” app with around 40 entries.
Of course, you can also use any other comparable app, a handwritten checklist or a list created in Excel, for example.
The advantage of the app is that I always have my smartphone to hand and can easily check whether anything important is missing while I’m packing.
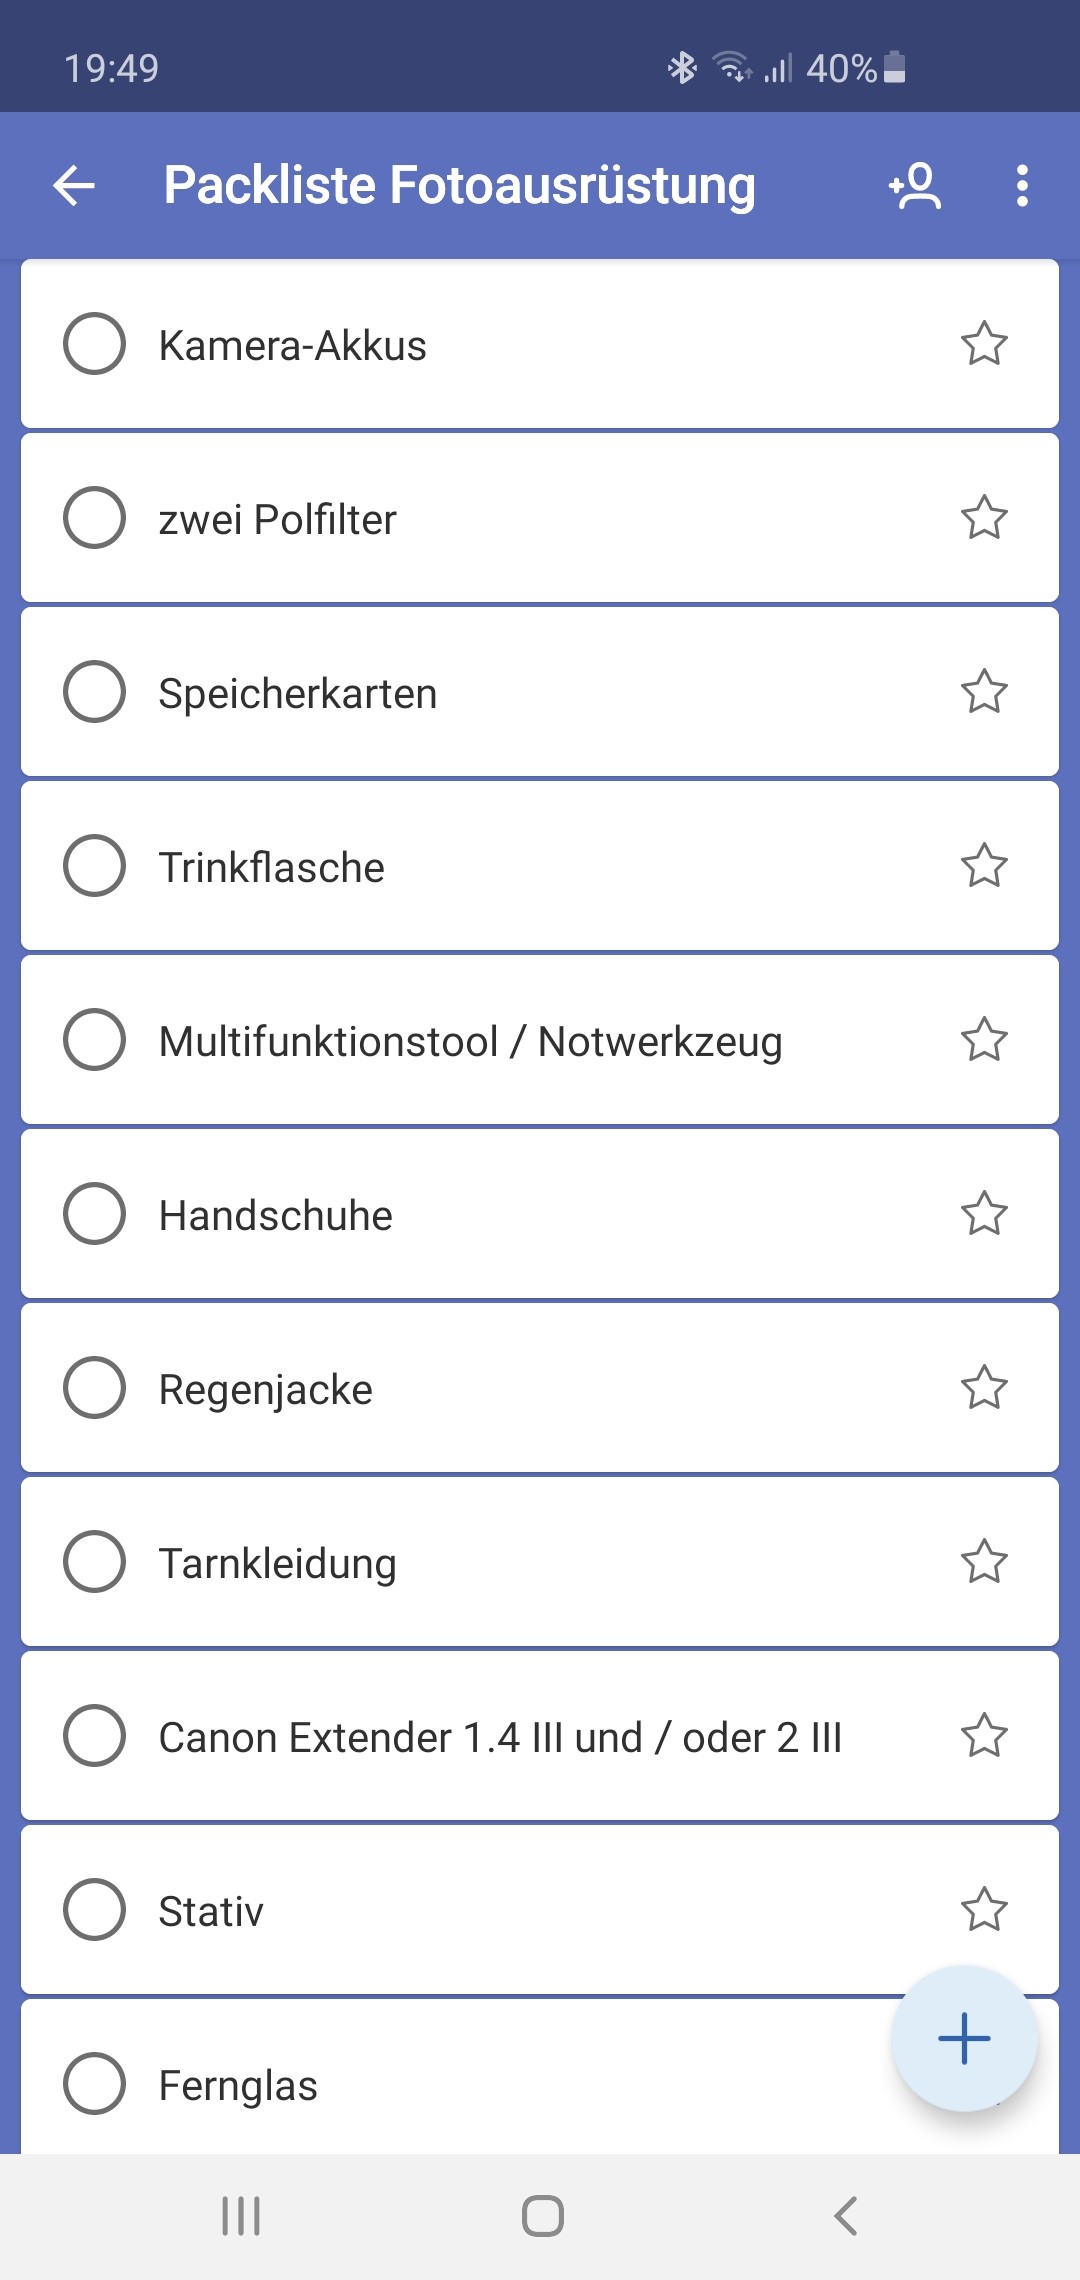
For each entry on the list, e.g. “tripod”, “power bank”, “binoculars”, etc., I briefly ask myself whether I need this item for my photo tour. If the answer is “yes”, pack it up and tick it off in the app, and if the answer is “no”, tick it off so that the list is empty.
There are of course items that are always in my photo backpack, such as a pocket knife, elastic bandage and painkillers. This makes packing even quicker.
After a while, you only really need the packing list for a quick check. Have I packed the “right” things? Okay, then let’s go! The whole process usually takes 10 minutes and I’m ready for my trip.
Of course, the same procedure is even better for longer trips. I then add other items to my list in advance, such as an international power adapter, notebook and external SSD for backing up data on site. It’s always helpful to do a little research about the local conditions, which is how I came across the important tip of organizing “spikes” for my winter boots for my first winter trip to the Norwegian coast, as it can get very slippery on the rocks along the coast.
I then create a second list in the app for my normal luggage.
Another tip: If you use the desktop version in addition to the Microsoft To Do app, the lists can also be quickly duplicated and further refined and synchronized (assuming you have a Microsoft account). For example, a packing list for landscape photography and one for wildlife photography.
Starting the photo tour or photo trip well prepared gives me a comfortable feeling, as I can rely on having everything I need with me.
If you have any questions about this blog post, feel free to write to me using the contact form.
I hope you enjoy packing for your next photo tour.